HOW TO INSTALL MOBILE PRESETS
For those who have purchased my mobile presets: thank you so, so much!
Here’s how to install Mobile Presets.
It might seem difficult at first, but it’s not!
And luckily you will only have to do it once 🙂
— STEP ONE —
If you haven’t already, first download the Lightroom App in the App Store or on Google Play. The icon looks like this:
App Store 
Google Play
You also have to sign up for an Adobe account.
Note: downloading the app and creating an account is FREE!
— STEP TWO —
You have received an email from me (or the person you purchased presets from) with a link to download your files.
– First unzip the files. The easiest way is to do this on a computer.
– Then send the DNG files to your phone (AirDrop or email) and save them.
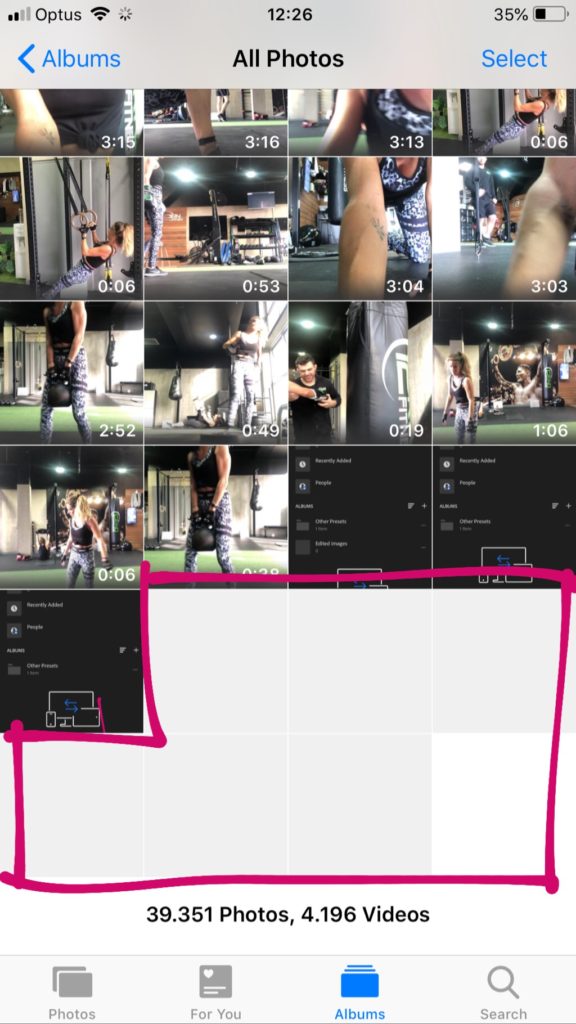
– You will now see six DNG files in your phone’s photo album. It is correct you might not see an imagine – but don’t worry, that’s normal:
— STEP THREE —
Now open your Lightroom app to import the DNG files:
1) Press the icon below to add images.
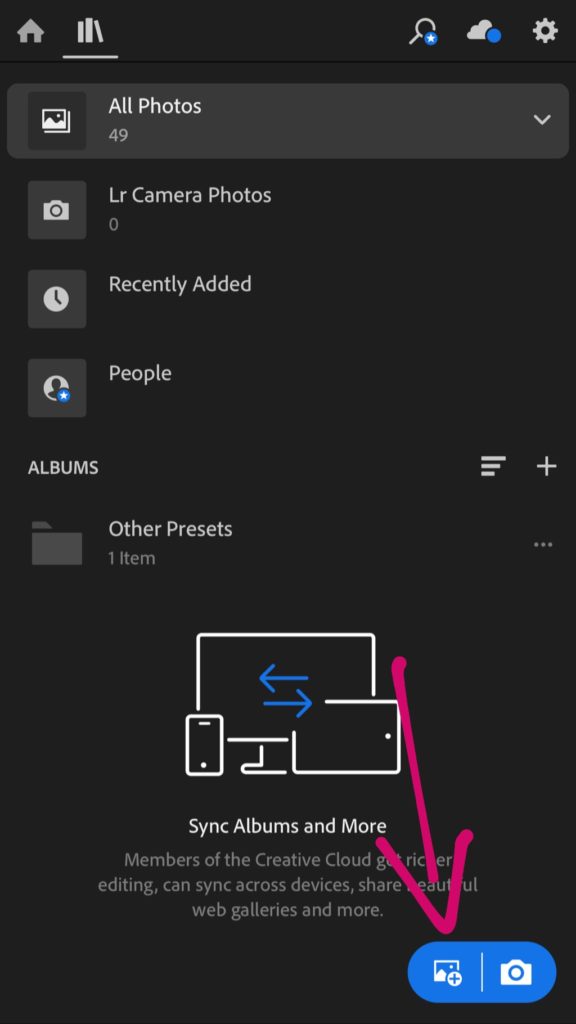
(If you don’t see this icon straight away, press the three little dots in the upper right corner first).
2) Select the source where you saved the DNG files. I saved mine in my Camera Roll. The Lightroom app might also not show the actual images. Again, don’t worry.
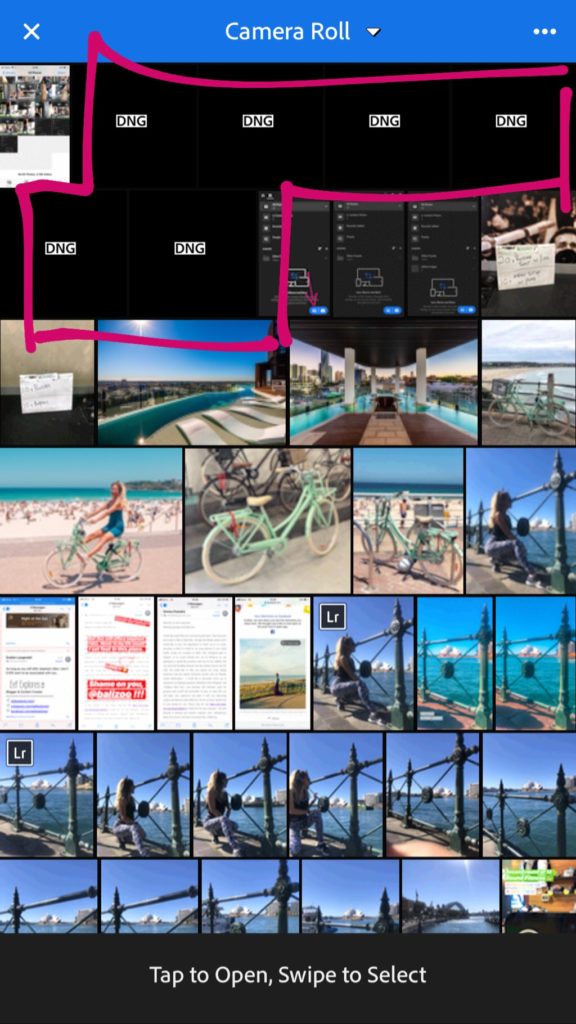
3) Select one of the six files. Your Lightroom app will say it cannot load the image.
Then press the checkmark in the upper right corner.
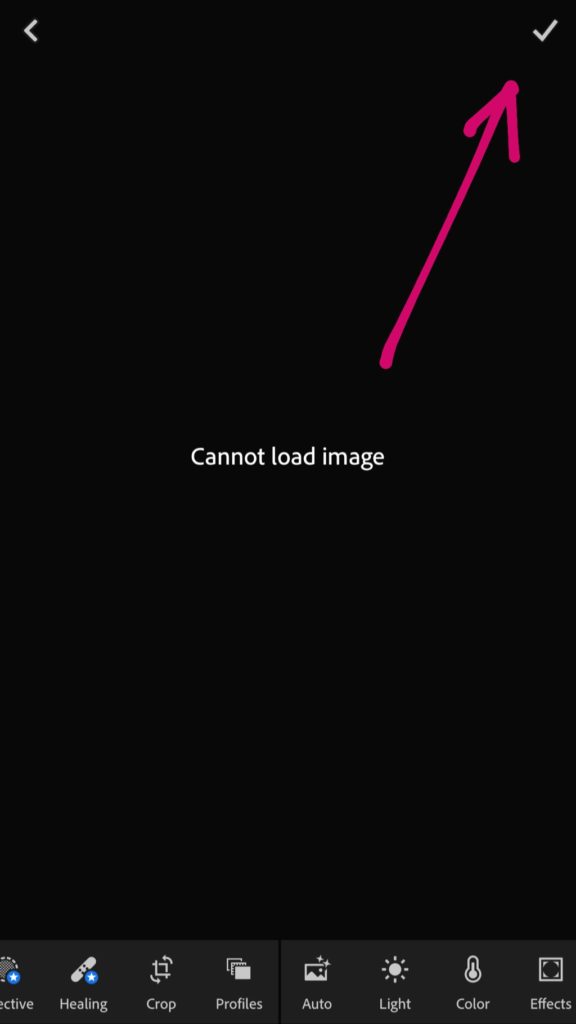
The DNG is now imported and the preset is ready to use. Continue with all six files until you’re done.
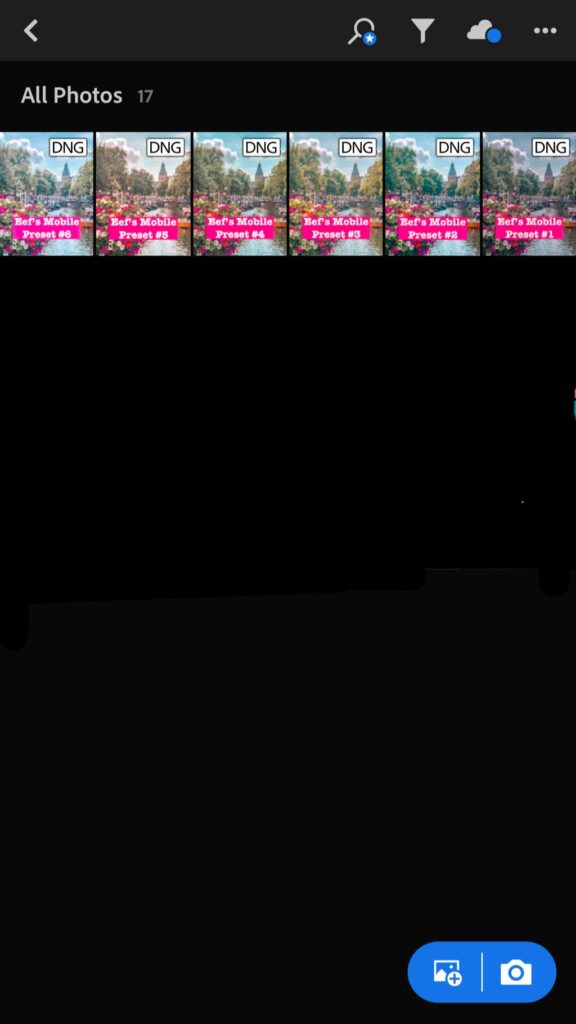
— STEP FOUR —
You have now imported
all DNG files which have the presets “on them”. It is now time to actually save
the presets to your Lightroom app.
1) Open Eef’s Mobile
Preset 1 and tap the three dots in the upper right corner:
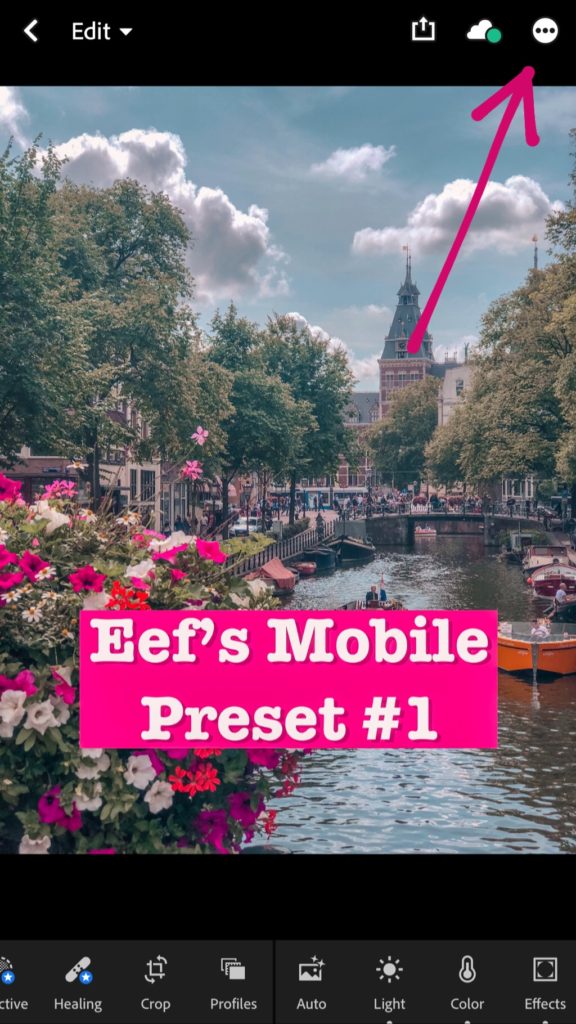
2) Select “create preset”
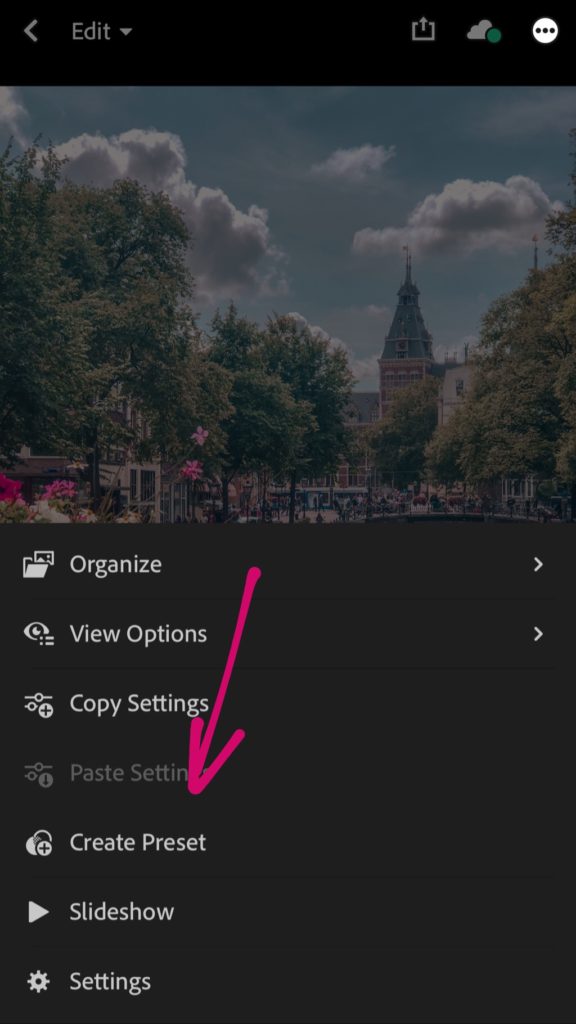
3) Name the preset, for example “Eef’s Mobile Preset 1” and save it.
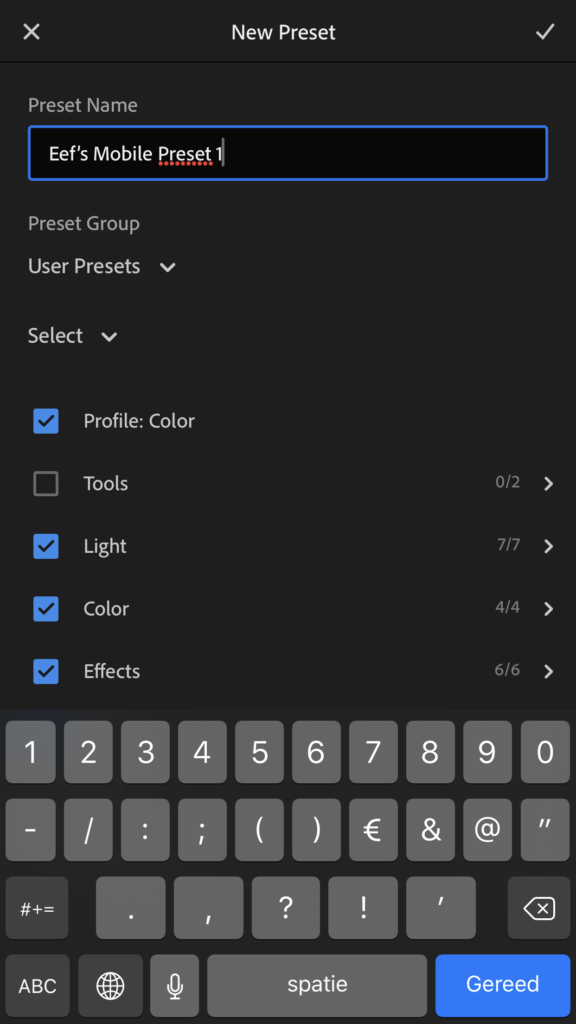
(Don’t check the boxes for tools, optics and geometry)
4) Continue doing this for all six presets.
— STEP FIVE —
The presets are now ready to use!
Open any photo you’d like to edit from your camera roll.
At the bottom, scroll all the way to the right to where it says “Presets”:
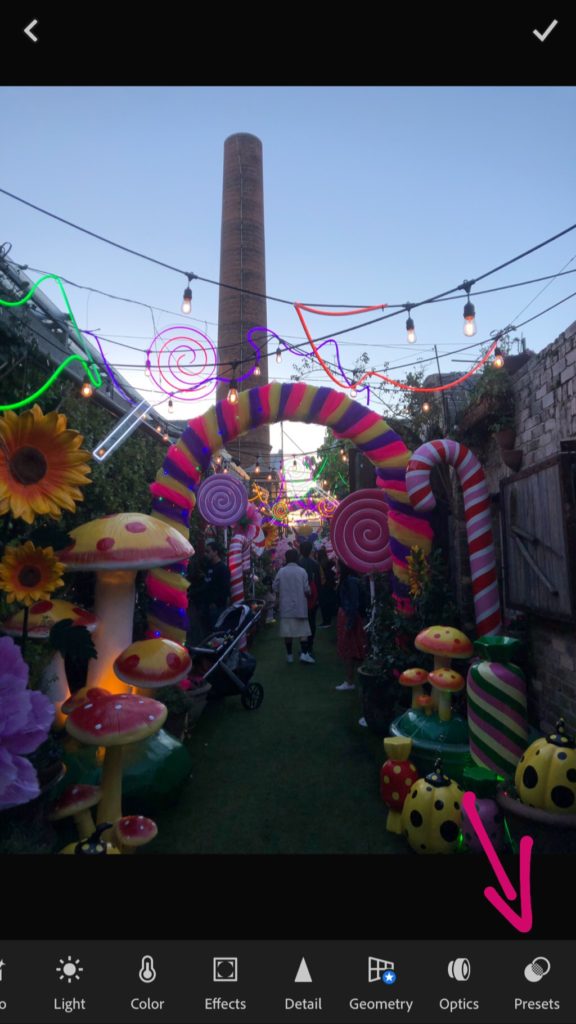
And select the preset you want to use!
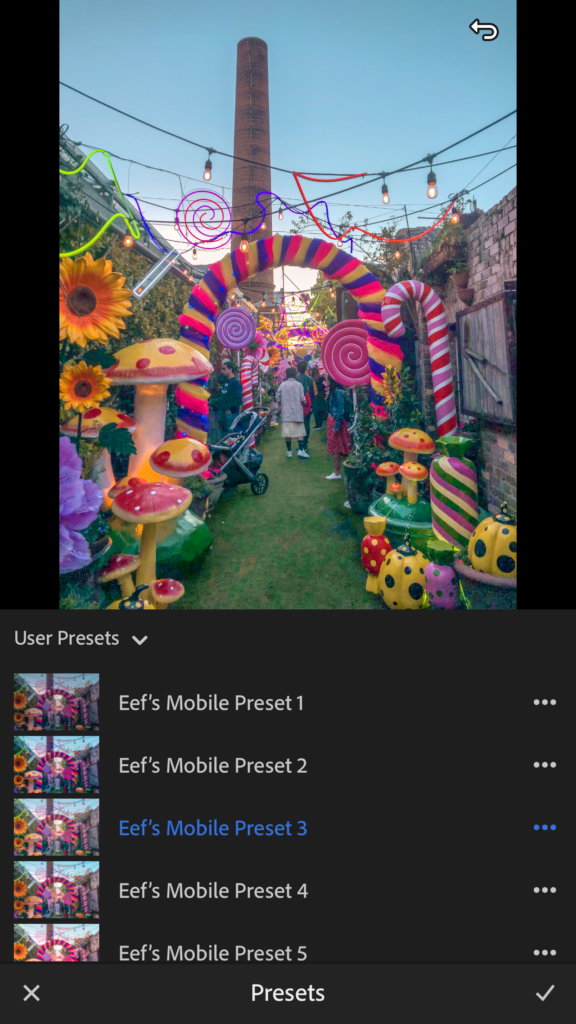
Press the checkmark at the bottom right and BOOM! You just applied the preset to the image 🙂 Well done!
FURTHER EDITING
I rarely ever only apply a preset and *poof* I’m done. I usually tweak the image slightly by decreasing or increasing exposure, white/black balance and some individual colors.
If you like photo editing and want to learn more, I suggest you hop onto YouTube. There are many helpful videos with tips and tricks on how to get the most out of your Lightroom Mobile app.
If anything is not working or if you have any further questions then please do not hesitate to email me at eef@eefexplores.com – I’m always happy to help out 🙂
HAPPY EDITING!
Don’t forget to share your edits with me by tagging me @eefxplores or by using #eefspresets
